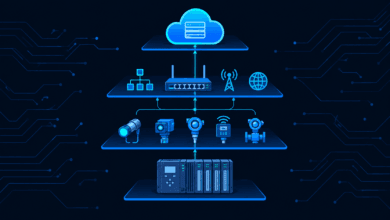

Getting Started with Thinger.io: Scalable Cloud Architecture for IoT


Connecting embedded devices to the cloud requires a reliable, lightweight infrastructure. Thinger.io provides an intuitive cloud platform designed for connecting, managing, and controlling Internet of Things (IoT) hardware in record time.
Consequently, developers use Thinger.io to streamline telemetry flow between physical microcontrollers and cloud analytics dashboards.
What is Thinger.io?
Thinger.io offers a scalable IoT ecosystem that simplifies communication across hardware platforms like ESP32, ESP8266, Raspberry Pi, and Arduino.
Furthermore, developers can access the platform via a public cloud service or deploy an open-source private cloud instance. Therefore, Thinger.io serves hobbyists, industrial deployment teams, and commercial enterprises alike.
Key Features and Core Capabilities
Thinger.io equips developers with essential tools to build robust connected applications:
- Rapid Setup: Engineers connect hardware to cloud dashboards using a few lines of code inside Arduino sketches.
- Real-time Dashboards: Users build interactive visual interfaces using widgets like buttons, gauges, sliders, and live line charts.
- Standard Protocol Support: The platform ensures secure communication using lightweight MQTT protocols and HTTP REST APIs.
- Advanced Device Management: Operators monitor connection status, track fleet telemetry, and dispatch remote commands centrally.
- Webhooks & Third-Party Integration: System integrators connect data flows directly to Telegram triggers, custom databases, or external servers via webhooks.
- Granular Access Security: Administrators generate scoped access tokens to share data safely without exposing primary credentials.
How Thinger.io Works: The Hardware Deployment Workflow
Deploying an embedded project on Thinger.io follows a simple, structured workflow:
- Account Registration: Create a developer account on the Thinger.io cloud portal.
- Device Provisioning: Register new hardware under the device management panel to generate unique credentials.
- Library Installation: Add the official Thinger.io library into your development environment, such as the Arduino IDE.
- Code Mapping: Write an embedded sketch that connects to Wi-Fi and maps pin variables like temperature sensor readings.
- Widget Binding: Drag and drop interactive widgets onto your cloud dashboard, linking them directly to live device variables.
Conclusion
Thinger.io lowers the barrier to entry for cloud-native hardware development. By offering lightweight protocol support, instant dashboard generation, and private deployment options, it remains a top choice for modern IoT projects.