

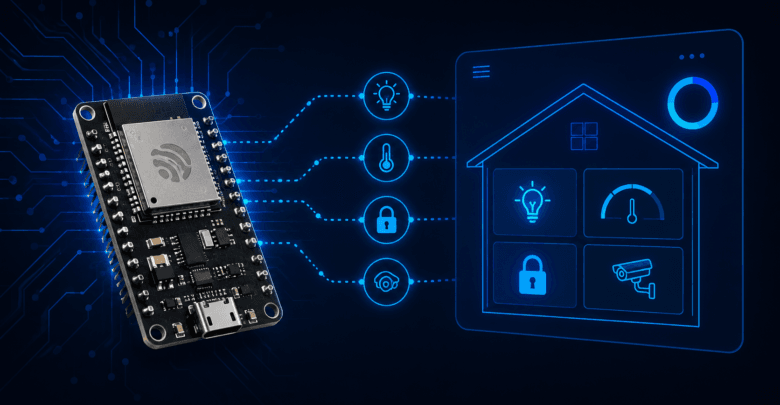
Home Assistant has become the go-to open-source platform for tying together smart home devices from dozens of different ecosystems — and the ESP32 is one of the easiest, cheapest ways to add your own custom sensors and controls to it. Instead of buying a proprietary smart plug or sensor, you can build exactly what you need for a few dollars in parts.
This guide covers the two most common ways to connect an ESP32 to Home Assistant: ESPHome (the easiest, no-code-required path) and MQTT (more flexible, more control).
Two Paths: ESPHome vs Manual MQTT
ESPHome is a companion project built specifically for connecting ESP32/ESP8266 devices to Home Assistant. You write a YAML configuration file instead of C++ code, and ESPHome handles the firmware generation, Wi-Fi setup, and Home Assistant integration automatically — including auto-discovery, so your device shows up in Home Assistant without manual configuration.
Manual MQTT means writing your own Arduino/C++ firmware (like in our ESP32 MQTT guide) and configuring Home Assistant’s MQTT integration to recognize your custom topics. This gives you full control over the firmware but requires more manual setup on both ends.
For most projects — especially your first one — ESPHome is the faster, more reliable path. We’ll cover both, starting with ESPHome.
Setting Up ESPHome
Installing ESPHome
The easiest way to run ESPHome is as a Home Assistant Add-on, assuming you’re running Home Assistant OS or Supervised:
- In Home Assistant, go to Settings → Add-ons → Add-on Store.
- Search for “ESPHome” and install it.
- Start the add-on and open its web UI.
If you’re running Home Assistant Container or Core (without Supervisor), you can run ESPHome as a standalone Docker container or via pip install esphome instead.
Creating Your First Device Configuration
In the ESPHome dashboard, click “New Device”, give it a name (e.g., livingroom-sensor), and select ESP32 as the board type. ESPHome generates a base YAML configuration, which you then customize. Here’s an example that reads a DHT22 temperature/humidity sensor and exposes it to Home Assistant:
yaml
esphome:
  name: livingroom-sensor

esp32:
  board: esp32dev
  framework:
    type: arduino

wifi:
  ssid: "YOUR_WIFI_SSID"
  password: "YOUR_WIFI_PASSWORD"

# Enables Home Assistant auto-discovery
api:

ota:
  password: "YOUR_OTA_PASSWORD"

logger:

sensor:
  - platform: dht
    pin: GPIO4
    model: DHT22
    temperature:
      name: "Living Room Temperature"
    humidity:
      name: "Living Room Humidity"
    update_interval: 60s
Click “Install” in the ESPHome dashboard, connect the board via USB for the first flash, and ESPHome compiles and uploads the firmware. After this first upload, future updates can be pushed over Wi-Fi (OTA) — no more cable required.
Once it boots and connects, the device appears automatically in Home Assistant under Settings → Devices & Services — no manual MQTT topic configuration needed. This auto-discovery is ESPHome’s biggest advantage over hand-rolled MQTT firmware.
Adding a Controllable Output (Relay/Switch)
yaml
switch:
  - platform: gpio
    pin: GPIO5
    name: "Living Room Relay"
This single block exposes a fully controllable switch entity in Home Assistant — toggle it from the dashboard, include it in automations, or voice-control it through any assistant integration Home Assistant supports.
Connecting via Manual MQTT (Alternative Approach)
If you already have custom ESP32 firmware using MQTT (as covered in our ESP32 MQTT guide), you can integrate it with Home Assistant instead of switching to ESPHome.
Step 1: Enable the MQTT Integration in Home Assistant
Go to Settings → Devices & Services → Add Integration, search for MQTT, and connect it to your broker (the same broker your ESP32 publishes to).
Step 2: Configure an MQTT Sensor
Unlike ESPHome, manual MQTT doesn’t auto-discover — you define each sensor explicitly, either through the UI or in configuration.yaml:
yaml
mqtt:
  sensor:
    - name: "Living Room Temperature"
      state_topic: "home/livingroom/temperature"
      unit_of_measurement: "°C"
      device_class: temperature
This tells Home Assistant to listen on the home/livingroom/temperature topic — the same topic your ESP32 firmware publishes to — and display it as a temperature sensor.
Step 3: Configure an MQTT Switch (for Control)
yaml
mqtt:
  switch:
    - name: "Living Room LED"
      state_topic: "home/livingroom/led/state"
      command_topic: "home/livingroom/led"
      payload_on: "on"
      payload_off: "off"
This creates a toggle in Home Assistant that publishes “on” or “off” to your ESP32’s command topic — matching the subscribe logic from our MQTT guide.
MQTT Discovery (Getting Auto-Discovery Without ESPHome)
If you want auto-discovery without switching to ESPHome, Home Assistant supports the MQTT Discovery protocol — your ESP32 firmware can publish a special configuration payload to a homeassistant/... topic that tells Home Assistant how to interpret your sensor, and it appears automatically, similar to ESPHome. This requires more firmware code but avoids manually defining every entity in configuration.yaml.
Common Integration Issues
Device Doesn’t Appear in Home Assistant (ESPHome)
Confirm the ESP32 successfully connected to Wi-Fi (check the ESPHome dashboard logs) and that Home Assistant and the ESP32 are on the same network — auto-discovery relies on mDNS, which typically doesn’t cross network segments or VLANs without additional configuration.
MQTT Sensor Shows “Unavailable”
This usually means Home Assistant isn’t receiving messages on the expected topic. Double-check the topic name matches exactly (case-sensitive) between your ESP32 firmware and your Home Assistant YAML configuration, and confirm your ESP32 is actually publishing — test with a tool like MQTT Explorer to see the raw messages on the broker.
OTA Updates Fail (ESPHome)
Make sure the device and your computer (or Home Assistant) are on the same network, and that you’ve set an OTA password in your YAML configuration if required. If OTA consistently fails, a wired USB update usually resolves it.
Which Approach Should You Choose?
Choose ESPHome if:
- You want the fastest path from hardware to a working Home Assistant entity.
- You don’t need highly custom firmware logic beyond what ESPHome’s components support.
- You want automatic OTA updates and auto-discovery without writing that logic yourself.
Choose manual MQTT if:
- Your project needs custom logic that ESPHome’s YAML-based configuration can’t easily express.
- You’re already comfortable writing ESP32 firmware and want full control.
- You’re integrating with a broader MQTT-based system beyond just Home Assistant.
Conclusion
Whether you use ESPHome’s YAML-based simplicity or hand-roll your own MQTT firmware, the ESP32 turns Home Assistant from a hub that controls other people’s devices into a platform for building exactly the smart home sensors and controls you actually want. Start with ESPHome for your first project — its auto-discovery and OTA support remove most of the friction — and move to manual MQTT firmware once you have a specific need ESPHome’s components don’t cover.
If you’re building a battery-powered sensor for Home Assistant, check out our ESP32 Deep Sleep guide — ESPHome has built-in Deep Sleep support (via its deep_sleep component), letting you combine long battery life with Home Assistant integration without writing custom sleep logic yourself.
For more hardware tutorials and modern embedded technology trends, explore our complete IoT Magazine collection.